
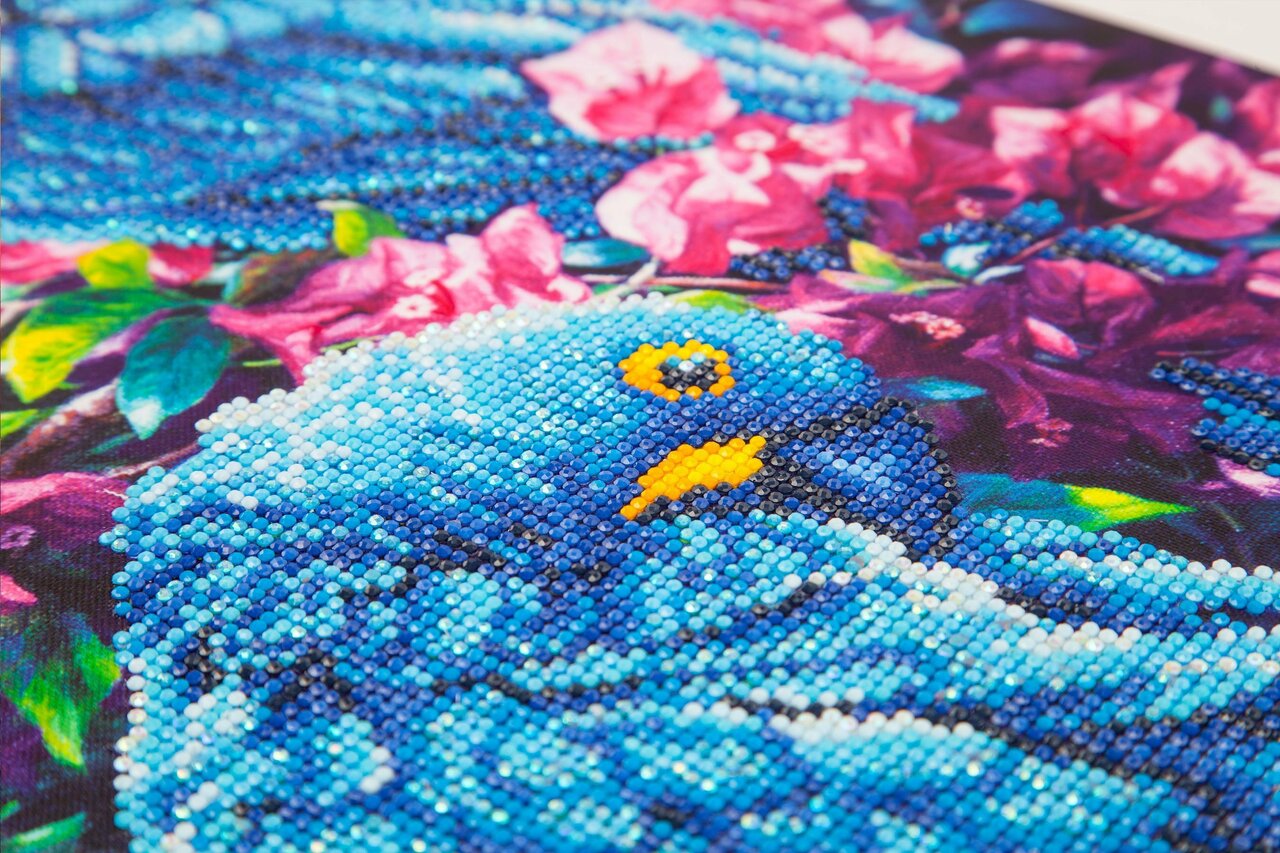
Diamond painting is a fun hobby and becomes easy with some essential diamond painting tips. Thus, anyone, no matter how old they are, can do it.
Neither you need any skill nor a background in art. Buy your first kit and get started, after learning a few tips and tricks from experts in this craft can help you avoid mistakes and enjoy the art process.
Most veteran admirers of diamond art wish they had known these tips before they started. But you still have time to learn before you gear up your journey of diamond art.
We’ve compiled a list of maestro diamond painting tricks and tricks to ensure you enjoy the hobby at your best without worrying about mistakes and setbacks. By the end of the article, you’ll be equipped with amazing tips that make your diamond art journey easier and more fun.
So, without further ado, let’s jump in!
Tips For Selecting the Diamond Painting Kit
Selecting the diamond painting seems straightforward, yet, if you follow some useful tips, how you soul select your diamond art kit as a beginner can assure the best experience.
1. Choose the Right Theme
As we know, diamond painting is the easiest and most fun hobby without experience. However, do you first need to figure out where you want to start? Which theme or project will go with your liking?
Not all trending diamond art paintings are for you! There are many themes available with dozens of different kits and tools.
Surf your net thoroughly and shortlist what strikes your interest; after short-listing, pick one theme and start from there.
Understandably, more complex designs that have many little details on the diamond painting canvas will be challenging for beginners. Similarly, if you're perplexed if you'll like it or not, start with the easiest canvas you find.
2. Choose a beginner's friendly size only.
The second tip is choosing the right size. When buying your diamond painting, the canvas size is the most important thing you have to see. The actual painting determines whether you should use a small, medium, or big canvas.
Suppose it’s a butterfly you have to diamond paint; then the small canvas can do the work. However, go with the enormous canvas if you're painting something like a landscape that needs more details.
Getting a big canvas is important for paintings that need more details. The small canvas can not show the tiny details more clearly than a big canvas.
So, how do you know what size painting to order?
Two things to take into consideration before deciding on the size of the painting
- The original artwork size
- Shading
The measurement used for Diamond paintings is often inches. There is no official size guide for painting, but we will categorize them into 3 categories to understand sizes better.
Small 7” - 9."
Medium 12"- 15"
Large 23" - 25"
Keep this formula in mind while selecting the size.
In small-size paintings, the painting’s main focal point or subject takes a lot of space, and the shading is quite easy. The subject contains more details and takes up a lot of space for medium size diamond painting.
At the same time, the shading is done by combining light, shadow, and mid-tone. The large one contains multiple images and lots of tiny details with the fine gradation of shades.
3. Don’t follow the crowd.
A painting is a limited edition doesn’t mean it's the best you could have. The painting might be famous but not something that you would enjoy. So you need to be careful not to get swayed by the marketing and buy something that doesn’t suit your taste.
It’ll be disappointing when you spend money and time on it but end up tired because the theme is not to your liking. So instead of getting something that other people want or something trendy, go with the one you're sure you’ll enjoy every second.
Tips for Choosing and Using Diamond Art Tools

4. Buy a large tray.
The right diamond pen and tray are game changers. A pen and tray with the kit are okay for a beginner, but if you want to take diamond art as a hobby, invest in one good large diamond painting tray.
The tray that comes with the kit's just too small. Refill the little tray again and again. Having a big tray means pouring out multiple colors at once while working on a big painting while with a small tray you can pour the same color.
5. Get a pen that is comfortable to hold.
The pen with the kit is tiny, and it’s hard to hold it for long-term use. The little pen can do the job if you only paint for 15 to 29 minutes. If you're addicted to the hobby and paint for hours, you must get a comfortable pen or transform your ballpoint into a pen tool that is comfortable to hold for a longer period.
You can also get soft silicon or an acrylic resin pen. Try getting a thicker pen to save your hand from cracking up. Or get crafty and make your one pen.
You can try a polymer clay pen using YouTube video tutorials. There are a dozen tutorials available on how to make one.
6. A Multi-Diamond applicator pen is better.
To make your work fast, you need a multi diamond applicator tool. The pen can hold three, five, and even more diamonds.
For the area with a lot of similar colors in one place, instead of applying one by one, you can apply five to seven at once with the help of the multi-diamond applicator pen.
7. Use washi tapes.
Don’t let the fuzz corner of the canvas kill your fun. Use Washi tapes on the edges of canvas; that way, you can work without rubbing your arm with the adhesive surface and messing it all up.
8. Use tweezers.
Tweezers are your best friend when you're working with tiny little diamonds. You can see them replacing a diamond if you place it in the wrong area. You can use the tweezer to nudge the diamonds to form perfect rows. This is the beauty of poured glue canvas! You can pick the diamond up if you spill it. Tweezer can give you a good helping hand.
9. Use a table easel.
If the table on which you paint works right for your height, then all is good. If not, do yourself a favor and get a table easel. Painting on a table, not the right size can hurt your back and neck.
Note: A reminder that you don’t need to buy all the accessories perfectly if you’re low on budget. You started the diamond painting to enjoy the therapeutic time with yourself, but going out of your budget to buy these accessories just because everyone else is raving about them will only make you feel more traumatized, so don’t do that.
You can diamond paint with the tools that came in the kit. However, if you can buy, then buy without guilt. You created a space for yourself, and these little accessories have their use and help you make your hobby more enjoyable for you.
10. Get the blue tack.
The red wax usually comes with the diamond painting and is not made of good quality. It dries out fast. Many people on the diamond art forum recommended blue tack as the replacement for red wax.
Getting a blue tack also saves you from repeatedly buying wax because a small tiny lump of wax can go a long way.
11. Buy a light pad or use your tablet.
The light pads are a game changer for a diamond art painter. Even if the room’s lighting is perfect, you can hurt your eyesight when you work on tiny details on the big canvas.
Getting a light pad is worth every penny. Place the canvas on your light pad; every little detail illuminates and makes your life easy.
Here’s a wired tip if you can’t spend money to buy a light pad. You can use your iPad or Android tablet for this purpose sounds crazy, but it works.
Tips for your Working Space
12. Make your workplace comfortable.
Your workspace can make or break any hobby. A spacious desk that can hold all your supplies is the first thing. Second, the size of the desk matters a lot.
You don’t want to hunch down and hurt your back by working straight for 4 to 5 hours. Make sure you have ample lighting in the room you're working in. If you feel the light is insufficient, invest in a good light pad that helps you see every detail.
13. Don’t work around people.
The space you're working in should be free from people and kids unless you're working with your kids or the whole family working together. A quiet space provides a more relaxing environment to work on the diamond art.
14. Remove all the distractions.
Some people don’t fully enjoy painting diamond dotz. They switch on the tv, a movie, or podcasts and then work on their painting.
It depends on person to person how they want to work. Whereas I think the diamond painting needs all your attention.
It’s not like the work is so difficult that you need undivided attention. But the fact is this hobby promotes better mental health. Having distractions will kill the main purpose of spending time with yourself and your diamond painting.
15. Keep all your tools on a big tray.
Having a mobile workplace allows you to move from one place to another. Some people need to change their work area from time to time. Changing the work area helps you focus more.
Take out the big tray from your kitchen and palace all your tools on it except canvas. If you can also fit the canvas in it, that’s a plus. Or you can use a puzzle to roll up the map or a big board that you can carry from one place to another.
Keep your canvas on the tray next to the tool you're working with, and eliminate the arm movement.
Tips for Working on Canvas
16. Work in smaller sections.
I understand your excitement when you work on your first ever diamond painting. However, you don’t need to finish it one go to see the results. Rather, work in small sections and enjoy the process fully.
17. Buy release papers.
Release papers work wonderfully better than the huge film protective cover with the canvas. You can remove one piece and work on that area rather than removing any other sticky parts.
18. Use the checkerboard method.
You might struggle with keeping the diamonds line straight when working with square drills. The checkerboard method is really helpful for this purpose. It relieves you from the pressure of placing each diamond carefully.
Filling the space that you leave during the checkerboard pattern makes you feel oddly satisfied. Checkerboard reduces the chance of having any space left on the canvas and straightens the line more nicely than working on multiple ends.
19. Remove air bubbles.
When you work on the canvas, there are some areas where no matter how hard you try, the diamond won’t stick. This might happen for various reasons. Maybe the adhesive has dried out. But another common problem that painters won’t notice is the bubbles that are created on the canvas.
The air bubble doesn’t let the drills sit on the adhesive flat surface. Take a paper cutter and gently slice the area where you can spot the air bubble. Don’t push too hard that you cut through the canvas; just a light slice will do the job.
20. Flatten your painting.
Flattening the canvas the first time might be easy, but you need to lay it flat when you roll up and store it. It gets stubborn and won’t enroll easily. To avoid such a situation, your best bet is to store them flat.
In case you rolled it up, there is no need to fret. Take a roller or rolling pin, place the protective film on the canvas, and gently roll the roller over the canvas. Make sure not to press hard so that your drills get messed up.
Repeat the process a few times, and you’ll have a nice flat canvas in front of you.
Diamond Dotz Choosing Tips
21. Get both round and square diamonds.
You might have heard that beginners should start with round drills because square one will be difficult. Well, try out everything. Don’t get intimidated by what others have to say.
What works for you might not work for them and vice versa. Instead of purchasing all round diamonds, you can go with half round and half squares.
Similarly, the same goes for the size of the canvas. First, try a smaller painting, then try a big one, and then see what goes well with you.
Start with easier painting first; once you master the technique, move to the difficult ones.
22. Drill quality matters.
Spend a little more to get good quality drills. You might wonder what the purpose of spending more is when you can get a cheap kit that works.
You’re right, but when you want to enjoy the hobby, spending extra on the quality of the product will turn your diamond painting experience to 360 degrees. Poor quality will only frustrate your work, plus drill never stays in their place for longer if the quality is not good.
You can inspect the quality of diamond dotz using a magnifier or dryer sheet. Before you open the packages, funnel them to lessen the static.
23. Sort your drills.
Unlike other paintings and artwork, diamond painting requires you to arrange your diamond by their color and DMC code. The task seems tedious but worth the results. You see nothing more frustrating than finding the right color in the pool of little drills.
Bags and diamond containers work well, but one tip that can help you categorize them neatly is mentioning the DMC code on each bag or container. You can take the double-sided tape, write the color or code, and paste them.
24. Use fabric spray or two tray to separate diamonds.
Those who already do diamond painting and struggle with a very common problem of diamonds sticking together should try using a fabric spray.
Spraying on diamonds will prevent them from sticking together. You can also use a dry sheet for this purpose.
Another amazing tip a user mentioned on a forum is using two trays to separate the drills from each other. They recommend putting the second tray on top of the first one and pressing down. With the popping sound, your diamond will separate easily. It’ll do the trick if they don’t give them a little rub back and forth.
25. Use a handy vacuum to pick spilled diamond dotz.
This must be a gasp moment for artists when they spilled their diamond drills on the floor.
Sounds scary? Just imagine, instead of doing diamond art, you must spend time and energy picking each drill from the floor. You must deal with such a situation craftily to save time and energy.
So how can you pick hundreds of little diamond dotz from the floor? Take a pantyhose and pull it over the end of a vacuum cleaner nozzle. Secure it with something tight and suck your drills up. Ta-da! Dump your drills back in the container without going from extra hazel.
Tips to sorting your final art piece
26. Do seasonal paintings.
This tip is for those veterans who have experienced diamond art junkies. If you're addicted to diamond painting and struggling to sort your masterpiece, try holiday themes painting.
You don’t have to look at some paintings the whole year around. Switch them every holiday or season.
This way, you’ll admire your old painting all over again. It also adds up in the decoration items you can use around holidays.
27. Do custom paintings.
Another clever thing for diamond art addicts is when you want to paint more but are short on storage, try gifting the painting to your loved ones. Not just any painting, but custom diamond canvas.
You get to paint the diamond art, and your loved one receives something you spend time and energy on, double the benefit.
When you buy paintings to gift to someone else, remember: Don’t feel pressured when making them as a gift and enjoy the process. Most of the custom designs came from Ali express, so they took lots of time, like 30 or 40 days, so make sure you order them accordingly.
However, remember ordering a custom one differs from ordering a normal diamond painting in the market. Always send the high-quality source image to the manufacturer to ensure you receive a good piece of custom diamond kit.
Make sure the picture is large enough with the right exposure of light, dark, and showdown layers.
28. Sort your diamond paintings in a hard carton box or portfolio bag.
After completing a design, you feel a sense of accomplishment as an artist; you want to do anything to protect your precious art. You’ll be extra careful that your painting won’t get any creases, bends, or drills that don’t fall off.
That’s why good storage for your painting is as important as spending money on quality tools and kits. Learn a sealing method that best secures the diamond dotz in their place and then stores your finished diamond arts.
Here are some of the best-storing ideas:
Use Form Board.
Use a form board for those who have a large diamond painting or are planning to start with the large one. Many diamond art hobbyists love to store their paintings this way. You can buy a form board or use any firm Hard Carton box available at home.
If you buy from the market, order the right size. Check the dimensions of your painting first and then order. Take two firm boards of the same size and dimensions and join them together using a strong type of tape; you can use duct tape.
You can be more creative and make a flap at one opening of the board that will make it easy to open the board.
Use a Storage Box.
Another way is to use a simple storage box at home. Cover your painting with a board or thin paper, then add other paintings above it. Seal the box with tape so dust goes inside the box.
Use Masking Tape.
If you love to decorate your room from time to time, take some masking tape and plastic cover and paste the painting on your wall. You can see if you like the painting on a particular spot on the wall, then you can also hang it there later.
Get a Portfolio Case.
If you're a perfectionist who is serious about your painting, I recommend ordering a good portfolio case or bag. This way, you're ensured that the painting is safe from any bent or dust.
29. Seal your diamond painting canvas.
After spending hours on a piece, you won’t want it to get messed up. That’s why sealing it's important before you store your painting. The process is fairly easy.
Use a coat of water-based seal glue like Mod Podge and apply it to your canvas. Clear the dust and particles using a brush before applying the seal.
Another important thing is to check that there are no significant gaps in the diamonds or any kind of bump on the surface of the canvas. After cleaning it properly, seal it with a coat of seal spray. Only apply a second coat when the first one dries out completely.
Sometimes you might find that sealant is pooping in between the diamonds dotz. Just take a toothpick and prick it out.
30. Use baby wipes.
Working while having a cup of coffee or a glass of water is common, and sometimes you might slip something on your canvas. Here, you just have to take baby wipes and clean the mess before it dries or ruins the adhesive surface. You can use makeup wipes as well.
Final Thoughts
There can be inevitable things that happen when you start doing your first diamond painting. Don’t be afraid to experiment. Figure out the diamond painting techniques that work for you
In the end, it’s all about learning the process and mastering it. Diamond painting makes you feel relaxed and is a great stress-relieving hobby. So don’t let tiny imperfections and mistakes get in your way of enjoying the art.
Always remember where there is a problem, there is a solution. When you get stuck, remember you have an entire community of diamond paint lovers who would love to help you out. You’ll get tons of impeccable advice from fellow diamond art enthusiasts.
Enjoy your Diamond Painting!